These freeze-drying basics are all the things you should know before you purchase a freeze dryer and can get your started on the right foot, even if you already have a freeze dryer. Once you know the basics you can decided if a freeze dryer is right for you or how to use your freeze dryer if you already have a freeze dryer.
How I Got Started
I started learning the freeze-drying basics well before I actually purchased our freeze dryer. I was already dehydrating food for long term storage, and I was already making dehydrated meals that my husband and I would take camping with us. However, I could never really get my dehydrated meals to fully rehydrate. It always tasted rubbery and I wanted to know if there was a better option.
The price is what made me do so much research on it a head of time. If you are doing the same thing I completely understand! I didn’t want to purchase an expensive machine if it was going to give us the same result as dehydrating. I needed to know if the price was worth us switching from dehydrating to freeze drying.
Spoiler Alert!! I will never go back to dehydrating unless it is to make powders (Garlic Powder/Onion Powder) or fruit leather.
Freeze drying is one of those things that can be really intimidating but, I am here to help take the intimidation away so you can get started confidently. If you are wanting to build a self-sufficient pantry, want to make ready to eat meals for busy days or camping trips, freeze drying is a wonderful option! If you want help building your self-sufficient Pantry, grab my free Pantry Guide.
Which Freeze Dryer to Get
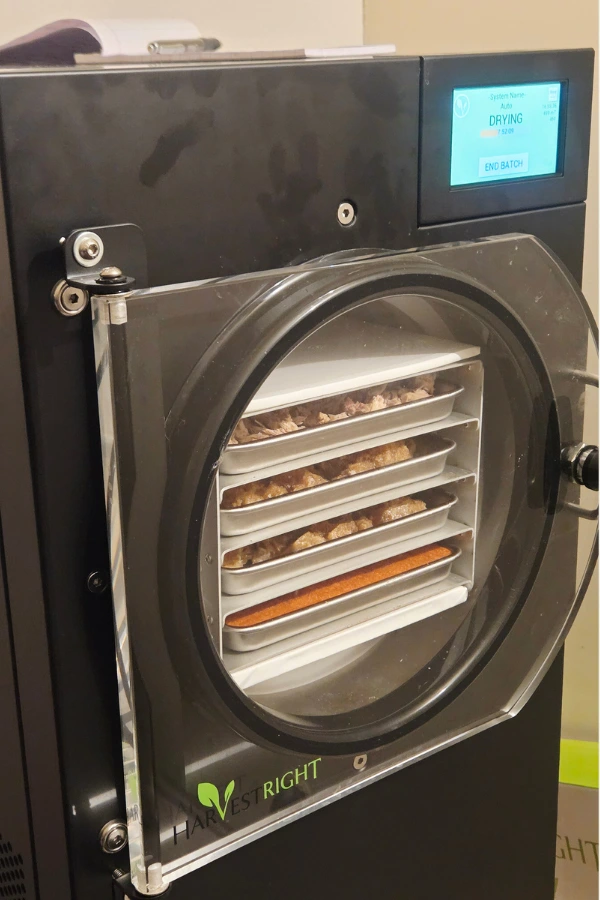
I have the Harvest Right Freeze Dryer in the small size. Good or bad, I do not have anything to say about the other brands because I have not used them and I cannot give you an honest answer. I will say, I absolutely LOVE the Harvest Right Brand. I haven’t had any issues, and it works wonderfully!
Before getting my freeze dryer, I had read that the harvest right brand was the most popular and had REALLY great reviews. Which is why we ended up getting this brand.
How The Freeze Dryer Works
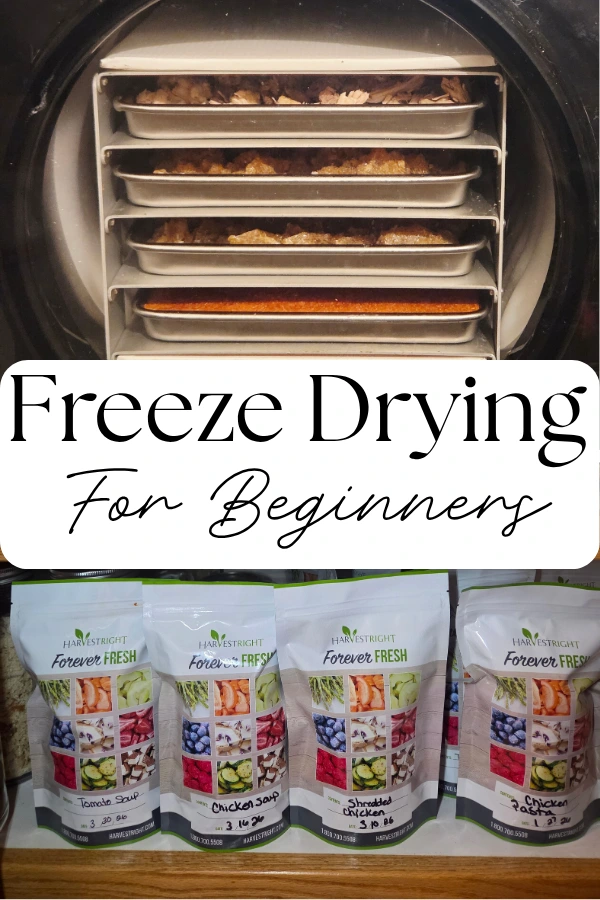
The Freeze Dryer is designed to freeze the chamber, including any contents on the trays. It then creates a vacuum type of suction that removes any moisture on the trays. There are sensors that determine how frozen the food is and how much moisture is left in the food. Once it senses that there is no more moisture left in the food, it completes its freeze-drying process.
After it has removed all the moisture your foods can now be stored in the pantry instead of the fridge. Wild, I know!! Instead of having a freezer full of frozen veggies, meats, meals… they can now go in the pantry. If you store them in an airtight container with an oxygen absorber, your food will last for months. If you add an oxygen absorber and vacuum seal the air out, it could last for years!!
What You Can Freeze Dry
A freeze dryer can preserve almost anything! I was actually very impressed when I first started looking into it what we can and cannot freeze dry. I’m still very impressed. I have had my freeze dryer running almost every day since I set it up.
I have freeze dried;
- Fruit
- Veggies
- Meat
- Broth
- Drinks
- Meals
- and so much more!
What You Cannot Freeze Dry
Not everything I have freeze dried has turned out successful.
One time, I attempted to freeze dry pure lemon juice, it just got caked onto the bottom of the trays and I honestly couldn’t get it off the bottom of the tray without rehydrating it. I found out you have to freeze dry the pulp with the lemon juice to get a nice powder out of it.
I have also tried to freeze dry Turkey Bacon. It tastes amazing as a crunchy snack as soon as it comes out of the dehydrator. However, after I packaged it up for long term storage, it went rancid. It had a weird, very bad taste that I couldn’t fix. I am assuming the little bit of fat that it had in the bacon made it go bad.
I have tried to freeze dry whole uncooked eggs, but the yoke didn’t freeze dry completely and ended up going bad because it still had moisture in the middle. If you want to freeze dry eggs, you will need to scramble the yoke and whites together or separate the yokes and whites, then scramble them separately so they freeze dry all the way through.
I have also tried to freeze dry things that had too much sugar… It puffed up into a big sugary mess! If you want to freeze dry anything with a lot of sugar, make sure you dilute it with water, so the sugar doesn’t puff up and go crazy inside your freeze dryer.
To break it down into simple terms. You can freeze dry almost anything that doesn’t have a lot of fat. Fat does not freeze dry and will turn food rancid. If it has a lot of sugar, you will need to dilute it with water. However, Avocados are an exception to the rule. They may be high in fat, but they dehydrate beautifully!
Rehydration Process
The rehydration process will completely blow you away!! Everything I have rehydrated tastes exactly like it did when it was fresh and it only tastes a few minutes to rehydrate. It can also be rehydrated with hot or cold water. This blew me away because when I was dehydrating, the food can only be rehydrated with boiling hot water, and it never rehydrated to its original form.
Want to know what the difference is between Dehydrating and Freeze Drying? I have explained it in simple terms in this blog post –> Freeze Dry Vs. Dehydrating.
If you rehydrate Freeze Dried food with hot water, it will rehydrate faster than if you use cold water. However, if you use cold water, it will still rehydrate within a few minutes depending on what you are rehydrating, of course.
How to Operate the Machine
Just looking at the freeze-drying machine can feel intimidating! I’m going to tell you right now… it’s way easier than you think! Let’s walk through this the simple way. When you receive your freeze dryer, the first step it to hook everything up, but don’t worry, they actually send you step by step instructions for this. The next step (which they have spelled out for you in the manual) is to run your first cycle.
Decide what foods to preserve
After you have ran your very first cycle as the manual suggests, you can now freeze dry your very first batch of food. What food you choose to freeze dry is completely up to you. I suggest doing things that have very little sugar and no fat so that you can get the hang of how the machine works. I did a little bit of everything for my first batch. Some veggies, some fruit, some meat… That was because I wanted to test out how it all works with different foods.
Pre-Freeze or Not?
Once you have picked what foods you are going to start with, it’s time to move onto the next step. You have a couple choices to make.
- You can freeze the foods you are going to be preserving a head of time to cut down on the amount of time it takes to freeze dry it because it’ already frozen.
- You can put it right into the freeze dryer and the freeze dryer will freeze the food before pulling the moisture out.
The choice is totally up to you. Once the food is ready to go into the freeze dryer you are going to hit the start button. A display will pop up that says to wait 15 minutes before putting your food in. After the 15 minutes is up, you can add your pre-frozen or thawed food in the freeze dryer, close the door, close the drain valve and press continue.
Freeze Drying Process
The machine will then start the freezing process. Once everything is frozen, it will then start the drying prosses. The drying processes takes the longest. Sometimes it will jump to an extra dry time if the machines sensers are still sensing moisture. When it is done, it will say complete. At this point you can open the drain valve to release the pressure so you can open the door. If you do not release the pressure, you will not be able to open the door. Once you get the door open, check to make sure everything is dry. There should not be any moisture left! If there is still moisture, click the ‘extra dry time’ button. If everything is dry (which it usually is), then take your food out of the machine and hit the defrost button.
That’s it! You have completed your first freeze dried batch of food!! Wasn’t that simple?
Storing Freeze Dried Foods
When your freeze dryer is done and you’re ready to store your food, there are a few things to consider.
- Will you be using the food right away (within a few months)?
- Will you be storing the food long-term?
- Will you be traveling with the food?
- Will the food be stationary?
Depending on your answer to these questions will determine how you are going to store them.
- If you will be using them within a few months, you just need an airtight container. (Something like this).
- If you are storing them long-term, you will need an oxygen absorber (like this) and a vacuum sealed container. I like to use a mason jar (like this one) for bulk storage and the vacuum sealing machine (this one).
- If you will be traveling, I highly suggest Mylar Bags. Harvest Right Freeze Dryers actually gives you mylar bags when you purchase your freeze dryer. If you need more, you can always find more HERE.
- If you are going to be stationary, I suggest the Airtight container or mason jar and vacuum sealer (I have them listed above).
Conclusion
I hope this was helpful for you on your journey to building a self-sustaining pantry! If I had to do it all over again, I would skip the dehydrator and go straight for the freeze dryer. It is honestly the best investment I have made in my journey to building a self-sustaining panty. If you have any other questions, you can ask them in the comments section, and I will get them answered as soon as possible.
Other Articles You May Like
- Freeze Drying Vs. Dehydrating
- How to Stock 6 Months of Food
- Building a Self-Sustaining Pantry When Money is Tight
📌Pin This For Later!