There are moments in this life that you just don’t plan for. Getting handed three turkeys in the middle of Yellowstone National Park is one of them.
It was Thanksgiving. Curtis was managing his department at the park, which means we don’t always get to leave for the holidays, and this particular year, we weren’t going anywhere. The park gave every full-time employee a turkey as a thank you for staying through the season. That was already a win. But it didn’t stop there.
Because most of the full-time staff live in housing without kitchens (those apartments are reserved for managers), one of Curtis’s employees had nowhere to cook his. He handed it to us. So now we had two turkeys and absolutely nowhere to put them.
Here’s the thing. We had spent the better part of the fall stocking our freezer for the winter. When you live inside a national park with the nearest real grocery store over an hour away, you learn to plan ahead. That freezer was completely, not-an-inch-to-spare, packed full. There was no room for a turkey, let alone two of them.
On top of all of this, the managers organized a full potluck-style Thanksgiving dinner for everyone who stayed behind. The company donated an extra turkey specifically for that dinner so nobody had to give up their own bird. I used one of ours for the potluck and made sourdough dinner rolls from scratch and a big pot of gravy to go with it. It turned out to be a real Thanksgiving. Long table, too much food, and people who had become family over the course of the season. I’m really glad we did it.
But then it was over, and I was standing in our apartment with two raw turkeys, a fridge with only a few days of runway, and a freezer that wasn’t going to budge.
I had to figure something out fast.

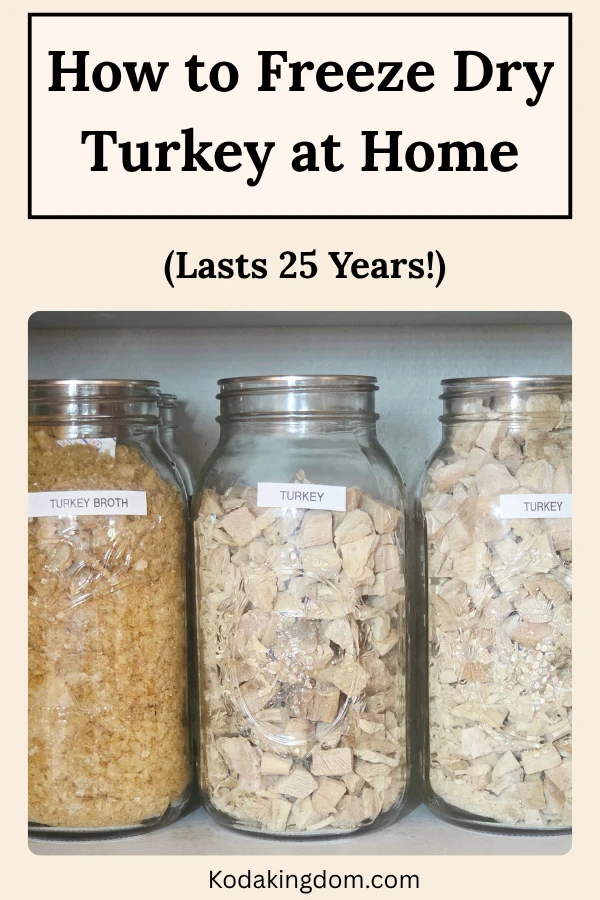
How to freeze dry turkey in a nutshell: Cook the turkey fully, cut it into pieces no thicker than about an inch, load it onto your Harvest Right trays in a single layer, and run it on the default settings. Once it comes out of the freeze dryer, vacuum seal it immediately. Do not wait. Packed in mason jars or Mylar bags with an oxygen absorber and a solid seal, freeze dried turkey lasts up to 25 years at room temperature.
When the Freezer Is Full and the Turkey Is Not Going to Wait
The two turkeys sat in the fridge for a couple of days while I figured out my plan. I didn’t cook them both at once. I tackled them one at a time.
Once I had the first one cooked and cooled, I carved everything off the bones and cut the meat into manageable pieces. Then before committing the whole batch to the freeze dryer, I ran a small test first. I wanted to make sure it would actually turn out well and rehydrate properly before I loaded up the machine with everything we had.
I rehydrated one of the test pieces and handed it to Curtis to taste. He said it tasted pretty close to fresh. He had no idea it was freeze dried until I told him. That was good enough for me.
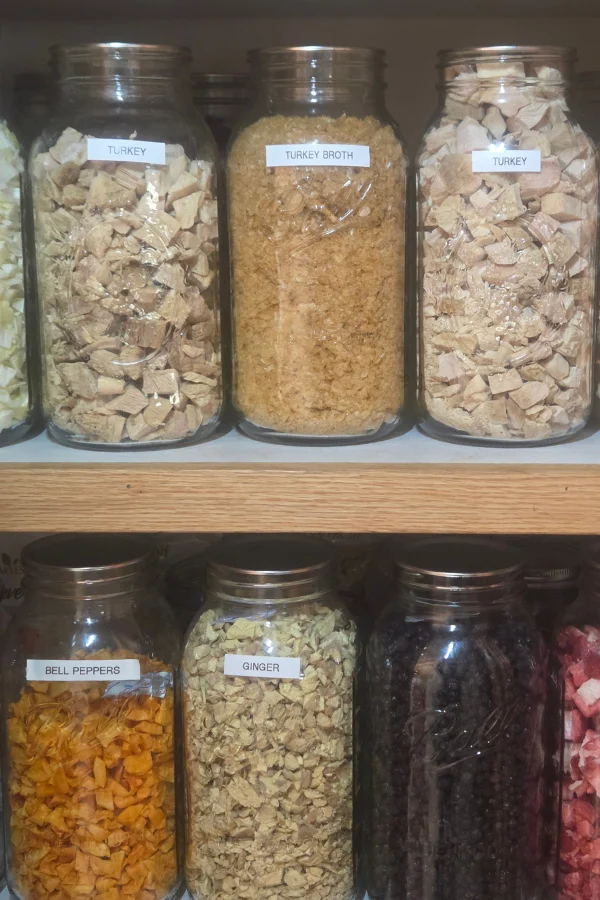
I ran everything else through in batches, packed it all into half-gallon mason jars, and suddenly two entire turkeys worth of meat was sitting neatly on a pantry shelf, shelf stable, taking up almost no freezer space at all. Problem solved.
And then I did one more thing that I am really glad I thought to do.
Don’t Throw Away the Carcass

After I finished with the meat, I used both carcasses to make bone broth. I’m not one to waste anything, and turkey bones make a really rich, flavorful broth worth keeping.
Once the broth was done, I poured it onto trays and ran it through the freeze dryer too. It comes out as a dry powder that you can scoop straight into soups and stews without rehydrating first. No freezer space. No jars of liquid taking up shelf room. Just a small container of powder that turns into rich bone broth whenever I need it.
If you are going to go through the effort of freeze drying your turkey, do not skip this step. The broth is easy and the payoff is worth it. If you want to see a full list of everything that freeze dries well, this post covers a lot of ground: Best Foods to Freeze Dry at Home.
Why Freeze Drying Beats Every Other Preservation Method for Meat
Freezing cooked turkey keeps it good for about three to four months before the quality starts to drop. Canning is an option but it changes the texture significantly. Dehydrating works for jerky-style strips but it doesn’t rehydrate the same way.
Freeze drying removes around 98% of the moisture while the food is still frozen, which means the cellular structure stays intact. When you rehydrate it, you get something that tastes and feels like the original, not a pale imitation of it.
The shelf life alone is worth it. Properly sealed freeze dried meat lasts 15 to 25 years at room temperature. That is not an exaggeration, it is how the science works. Remove the moisture, remove the oxygen, and there is nothing left for bacteria or mold to work with.
For anyone living without a reliable freezer, on the road, in seasonal housing, in a smaller space, a Harvest Right freeze dryer is what makes real long-term food storage actually possible. It is not a cheap piece of equipment, but it changes how you think about food security entirely. If you are new to freeze drying and want to understand how the whole thing works before you dive in, this beginner’s guide is a good place to start.
Cooked vs. Raw Turkey: What I Recommend
I freeze dried cooked turkey because that is what I had. But it is worth knowing the difference.
Cooked turkey rehydrates faster, is already food-safe, and is easier to use straight out of the jar in soups, casseroles, or anything where you are adding it to a liquid. This is what I would recommend for most people.
Raw turkey can be freeze dried but requires more caution. It is still raw when rehydrated, which means it must be fully cooked before eating. The freeze drying process does not cook it. If you go this route, follow safe meat handling practices closely and make sure your machine runs a full proper cycle.
For the simplest, most foolproof result, cook it first.
How to Freeze Dry Turkey Step by Step
You do not need to do anything fancy here. I used the default settings on my Harvest Right and it worked perfectly.
What you need:
- Harvest Right freeze dryer (all sizes work)
- Cooked turkey, cut into pieces roughly 1 inch thick or smaller
- Mylar bags or half-gallon mason jars
- Oxygen absorbers
- Vacuum sealer with jar attachment (if using mason jars)
Step 1
Cut and prep Remove any skin and as much fat as possible. Fat does not freeze dry well and can go rancid over time even in a sealed container. Cut the meat into uniform pieces so everything dries evenly. Thinner pieces finish faster and more consistently than thick chunks.
Step 2
Load the trays Spread the turkey in a single layer on your Harvest Right trays. Do not stack or pile. You want airflow around each piece. It is okay to have them touching but not overlapping.
Step 3
Run the cycle Close the machine and start the cycle on default settings. For cooked turkey, expect the cycle to run somewhere between 24 and 36 hours depending on the thickness of the pieces and how much moisture is in the meat.
Step 4
Check for doneness When the machine signals that it is done, pull out a tray and test a thick piece. It should feel completely dry and crunchy all the way through, not soft, not cool to the touch, not pliable. If any piece still has give to it or feels even slightly cool in the center, add two to four more hours of dry time. Do not skip this check.
Step 5
Seal immediately This is the most important step. The moment the trays come out of the freeze dryer, get that turkey sealed. Do not leave it sitting out. Do not finish one tray and walk away to do something else. Freeze dried meat exposed to air will start absorbing moisture and can go rancid faster than you expect.
I learned this the hard way with ham. I closed the jar finger-tight, figuring I had blocked out the air, but I was wrong. Within hours it had a rancid taste. By the next day it was inedible. There was no saving it. I have lost a lot of food making that mistake and I am telling you now so you do not have to.
Seal it immediately. Every time.
How to Store Freeze Dried Turkey
Option 1
Mason jars with vacuum seal lids This is what I use. Half-gallon mason jars work well for turkey because you can fit a good amount in each jar and they are easy to open and reseal. Drop in an oxygen absorber, attach your vacuum seal lid attachment, and let the machine run until it has a solid seal.
A couple of things I learned the hard way on this:
First, check the rim of the jar before sealing. Any food particles or grease on the rim will prevent a proper seal. Run your finger around it and wipe it clean if needed.
Second, let the vacuum sealer run long enough. I was only letting it run for 40 seconds and then stopping, and some of my jars kept losing their seal. Once I started letting the machine do its full job, (about 60 seconds or more) the seals held. You will know it is done when you hear the click and the lid is firmly sucked down with no flex.
If a jar loses its seal, re-seal it the same day. Do not leave it open overnight.
Option 2
Mylar bags with oxygen absorbers: Mylar bags are a great option if you are storing turkey for the very long term or if you want a more portable option for camping or travel. Use a heat sealer to close the bag after dropping in an oxygen absorber. Properly sealed Mylar gives you closer to the full 25-year shelf life.
Storage conditions
Cool, dark, and dry. A pantry shelf or cabinet away from any heat source is ideal. You do not need a special room, just avoid storing near the stove, in direct sunlight, or anywhere that gets hot in the summer.
How Long Does Freeze Dried Turkey Last?
Stored properly in a sealed mason jar or Mylar bag with an oxygen absorber, freeze dried turkey lasts 15 to 25 years at room temperature.
That is the real shelf life. Not “up to six months in the freezer.” Not “a year if stored correctly.” We are talking about a decade or more of shelf-stable protein you can throw into any meal in minutes.
For a family that moves, travels, or just wants real food security without depending on a freezer, that changes everything.
How to Rehydrate and Use Freeze Dried Turkey
The simplest method: add hot water and let it sit for five to ten minutes, then drain any excess. The turkey will rehydrate back to something very close to its original texture.
From there, use it anywhere you would use cooked turkey:
- Turkey noodle soup or broth-based soups (just add it straight to the simmering liquid)
- Casseroles and pot pie
- Turkey salad or wraps
- Scrambled eggs with turkey
- Quick rice or pasta dishes on the road
If you are cooking with it in a liquid dish, you do not even have to rehydrate it first. Just add it dry and let it absorb moisture as the dish cooks. This is one of my favorite things about freeze dried meat when we are traveling or camping. No cooler, no refrigeration, just real food that comes together fast. For more ideas on eating well without a cooler, this post has a lot of good options: Ready-to-Eat Meals Without Needing a Cooler.
Is a Harvest Right Freeze Dryer Worth It?
That is the question I get asked most. And the honest answer is: it depends on how you live.
If you have a permanent kitchen, a full freezer, and easy access to a grocery store, you might not need one. The upfront cost is significant.
But if you move around, live in seasonal housing, travel, or just want to stop relying on a grocery store showing up when you need it, a Harvest Right is one of the best investments you can make in your food security. It has changed how we eat on the road and made it possible to stock up when food is plentiful and eat well when it is not.
The turkey situation was the best example of that. What could have been a waste turned into a pantry stocked with real protein and shelf-stable bone broth for the better part of a year.
If you are building a pantry that works no matter where life takes you, the Adventure Ready Guide is a good place to start. It is free and it is built for women who want to be prepared without being weighed down.
A Few More Things I Want You to Know
Freeze drying is forgiving. You do not have to get it perfect on the first try. Run a small test batch before you commit a full load of anything you care about. Taste it. See how it rehydrates. Get comfortable with the machine before you load it up with your best cuts.
Also keep notes. After a few batches you will know exactly how long your specific machine takes for turkey, chicken, beef, and everything else. That knowledge is worth keeping somewhere.
And the last thing, enjoy the process. There is something genuinely satisfying about opening a jar a year later and sitting down to a meal made from food you preserved yourself. That is self-sufficiency in the most real sense of it.
Three turkeys showed up at our door that Thanksgiving. I did not plan it, did not expect it, and had absolutely no room for them. But we figured it out. We always do.
If you have been sitting on a Harvest Right wondering what to try first, turkey is a great place to start. Especially if someone happens to hand you three of them.
With love and adventure, Mindy
Have you tried freeze drying meat yet? Drop a comment below and tell me what you have worked with so far or what you are most curious about trying. I genuinely want to know.
📌Pin for Later