Homemade brown sugar is more than a DIY treat. It’s a space and money saving pantry hack. Whether you live in a small kitchen, rent, or move frequently, this simple recipe lets you make just what you need with ingredients you probably already have. No bulky packaging, no wasted space, just practical food systems that work in real life.
⬇️Pin this recipe ⬇️
Have you ever reached for a bag of brown sugar in the middle of baking, only to find a rock-solid clump that could double as a paperweight?
That used to happen to me all the time!!
When we started living and cooking off-grid more often, I realized that having reliable, shelf-stable staples mattered more than ever. I didn’t want to rely on last-minute grocery runs, and I wanted to know exactly what was in the food I was cooking.
That’s when I learned how ridiculously easy it is to make homemade brown sugar.
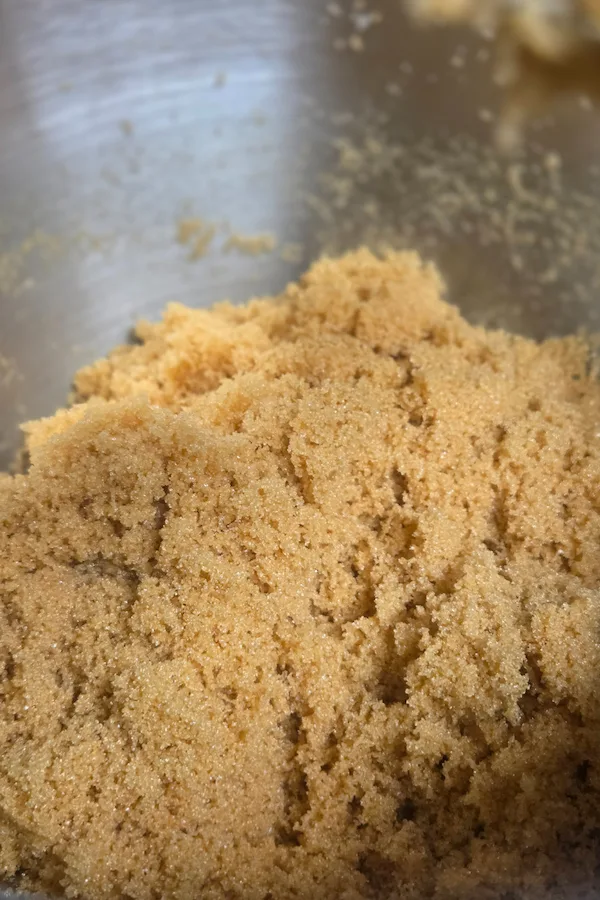
Just two ingredients, five minutes, and you’ve got soft, fluffy brown sugar ready for cookies, oatmeal, marinades or your next campfire cobbler.
Why Make Your Own Brown Sugar?
Homemade brown sugar is one of those small swaps that makes a big difference in your off-grid or minimalist pantry. Here’s why:
- Shelf-Stable for Months – When stored properly, homemade brown sugar lasts just as long as store-bought.
- Control the Flavor – Want light or dark brown sugar? You decide how rich and bold it tastes.
- Budget-Friendly – Buying molasses and white sugar in bulk is often cheaper than store-bought brown sugar.
- Perfect for Preppers & Campers – Easy to store in an airtight containers or vacuum sealed bags for long-term use. Here are the airtight containers I use and here are the vacuum sealed bags I use.
- Always Fresh – No more hard, dried-out sugar clumps when you make it in small batches or store it properly.
If you love easy DIY pantry staples, grab my free From Scratch Pantry System. It includes this recipe, plus other make-it-yourself essentials like powdered milk mix, homemade garlic powder, and instant soup bases.
How This Fits Your Pantry
If you’re building a pantry that’s meant for small spaces, frequent moves, or limited storage, homemade brown sugar saves you from storing large, single-use packages. You can make exactly what you need, keep it fresh, and reduce clutter, all while using standard pantry staples.
Homemade Brown Sugar Recipe
Ingredients
- 1 cup granulated white sugar (You can buy in bulk here)
- 1 tablespoon unsulphured molasses (for light brown sugar)
- or 2 tablespoons molasses (for dark brown sugar)
Tip: Avoid blackstrap molasses unless you love a deep, bitter flavor. It’s much stronger than the classic kind. I use this unsulphured molasses.
Instructions
- Combine Ingredients: Add sugar and molasses to a bowl.
- Mix Until Fluffy: Use a fork, whisk, or stand mixer (this is the Stand Mixer I have) until it’s evenly blended and soft.
- Store It Right: Transfer to an airtight container or mason jar (I love these airtight glass jars) or vacuum-seal in small portions for longer storage. (This is what I use)
That’s it! In just a few minutes, you’ve made something that tastes better, costs less, and lasts longer than store-bought.
Storage Tips for Long Shelf Life
- Airtight Container – Keeps moisture out and prevents clumping.
- Cool, Dark Place – Store in the pantry, away from heat and sunlight.
- For Long-Term Storage – Vacuum-seal in small portions; lasts 1-2 years in ideal conditions.
- Revive Dried-Out Brown Sugar – If it hardens, place a slice of bread or a damp paper towel in the container for 24 hours to restore moisture.
If you’re looking to level up your off-grid food storage, check out my From Scratch Pantry System. It walks you through shelf-stable swaps, storage setups, and printable checklists for your pantry.
FAQs About Homemade Brown Sugar
- How long does it last? In an airtight jar, up to 6 months. If vacuum-sealed, even longer. Over a year in ideal conditions.
- What kind of molasses is best? Always use unsulphured molasses for that classic, rich brown sugar flavor. (I’ll link to my favorite brand here)
- Can I use coconut sugar instead? Yes, but it will taste a little different. Molasses blends best with white sugar for that true “brown sugar” texture.
- Will it clump? It can if it’s exposed to air. Keep it airtight and toss in a terra cotta sugar saver (here’s is a link to a terra cotta sugar saver) or a slice of bread occasionally.
- Can I make a big batch? Absolutely! I often make a few jars at once to save time. Just make sure the molasses is mixed evenly throughout.
Ways to Use Homemade Brown Sugar
- Baking cookies, cakes, and breads
- Sweetening oatmeal or porridge
- Making BBQ sauces or marinades
- Adding depth to coffee or tea
- Sprinkling on roasted carrots or sweet potatoes
If you like easy, pantry-friendly ingredients like this, check out my Homemade Garlic Powder Tutorial and Cream of Anything Soup Mix, both are perfect for travelers, renters and seasonal living.
Final Thoughts
Learning to make your own brown sugar might seem small, but it’s one of those satisfying skills that reminds you… you don’t need to rely on store-bought everything.
Whether you’re off-grid, traveling full-time, or just trying to simplify your kitchen, this recipe will save you money, space, and stress.
Grab my free From Scratch Pantry System to learn how to stock up on healthy, shelf-stable staples and turn your pantry into a powerhouse of simple, sustainable ingredients.
📌Pin for Later


Homemade Brown Sugar
If you’ve ever started a baking project only to realize you’re out of brown sugar, you know how frustrating it can be.. You can easily make homemade brown sugar with just two ingredients you probably already have in your pantry.
Ingredients
- 1 cup Granulated Sugar
- 1 Tbsp Molasses (for light brown sugar)
- 2 Tbsp Molasses (for dark brown sugar)
- Click here for the molasses we use and recommend
Instructions
- Combine Ingredients: Add the sugar and molasses to a mixing bowl.
- Mix Until Fully Combined: Use a fork, hand mixer, or stand mixer to blend until the molasses is evenly incorporated and the sugar is soft and fluffy.
- Store for Later: Transfer to an airtight container, mason jar, or vacuum-sealed bag for pantry storage.
- See notes for the products we use and recommend.
Notes
- If you are using a stand mixer, you may need to stop it, scrape the sides and then start it again. The brown sugar builds up along the sides and does not fully incorporate if you don't scrape the sides.
- If you do not have a stand mixer, you can knead it with your hands to get the same results.
- The brown sugar is done when everything in your bowl is the same color. There should be no chunks of molasses (even if the chunks are small). If you see chunks, keep blending.
- Double this recipe as many times as you need to make this recipe in bulk.
- Products we use and recommend: HERE
If you want to stop buying boxed mixes altogether, I put all of my pantry replacements into one simple printable pack HERE.
FAQ
- How long does homemade brown sugar last? Stored in an airtight container in a cool, dry place, it will keep for several months.
- Can I make a large batch? Yes, but I recommend making only what you’ll use in a few weeks if space is limited.
I love how simple and easy this recipe is!
This is great to know and this way I can choose real organic cane sugar and pure organic sugar cane molasses. No worrying what weird things are in it, like GMOs or pesticides. Thanks so much for sharing!
100% This is why I started creating my pantry from scratch!
I’ve never tried this before. Thanks for sharing!
Of Course! Happy to Share!