This is the recipe I used to make soft and fluffy sourdough dinner rolls for our thanksgiving potluck and boy did everyone LOVE it! There were several people who said they were the best homemade dinner rolls they have ever had. They are light, fluffy and perfect for a thanksgiving feast!
If you’re new to sourdough or want to build a cleaner, off-grid-friendly pantry, grab my free From Scratch Pantry System. It’s the exact system I use to cook from scratch without stress.
Why You’ll Love These Sourdough Dinner Rolls
- Soft, fluffy, buttery, and perfectly golden
- Just a hint of sweetness from honey
- Uses active starter for the best rise and flavor
- Easy enough for weeknights, special enough for holidays
- Great for off-grid baking or prepping ahead
- Kid-approved, husband-approved, guest-approved… basically everyone-approved
If you’re working toward a cleaner, lighter, more homemade pantry like I am, these rolls fit right in. Everything is from scratch, and the flavors hit so much harder than store-bought dough.
Love homemade recipes like this? Check out my Homemade Baking Powder or DIY Brown Sugar Mix to stock your pantry the simple way.
Sourdough Dinner Rolls Recipe
Equipment I use and Recommend:
Ingredients
- 300 g water
- 150 g active sourdough starter
- 16 g honey (about 1 tablespoon)
- 1 large egg
- 42 g melted butter (about 3 tablespoons)
- 1 ¼ tsp salt
- 580 g all-purpose flour
Instructions
- Mix the dough – In a large bowl, combine your water, active starter, honey, egg, and melted butter. Stir until the starter dissolves into the liquid. Add the salt and flour. Mix until everything comes together into a slightly sticky dough. You can knead by hand for 5-8 minutes or use a stand mixer if you have one. The dough should still be slightly sticky.
- First rise – Cover and let the dough rise until doubled in size. Depending on your starter strength and kitchen temperature, this can take anywhere from 3-6 hours. (And yes, you can absolutely slow this down in the fridge overnight if you want to prep ahead.)
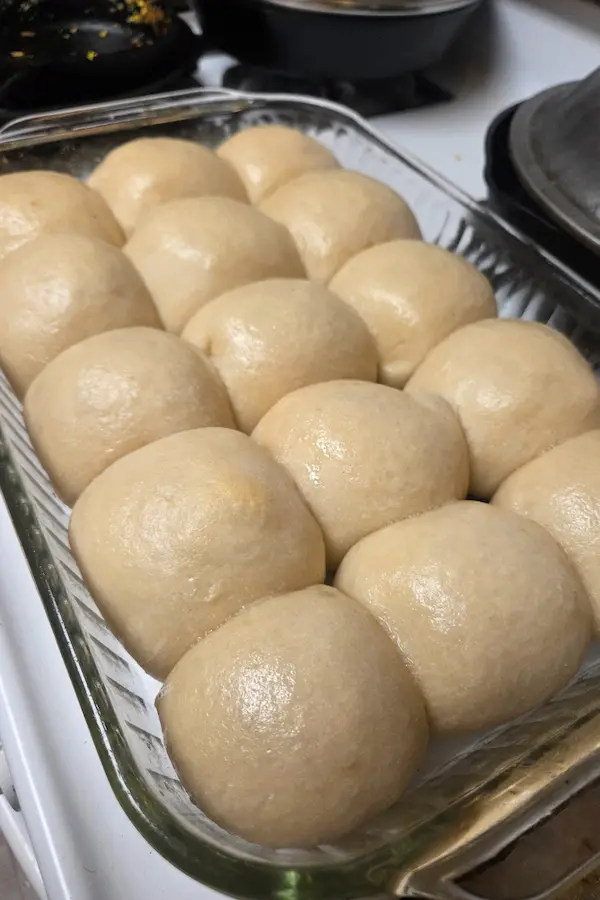
- Shape the rolls – Lightly flour your hands and divide the dough into even portions. I usually aim for 12–15 rolls, depending on what size you like. Shape each piece into a smooth ball by tucking the edges under until the top is tight and rounded. Place the rolls onto a greased or parchment-lined baking dish.
- Second rise – Let the rolls rest again until puffy and doubled. This step is the secret to getting that ultra-light, tender texture.
- Bake – Preheat your oven to 375°F (190°C). Brush the tops of the rolls with an egg wash to get that nice golden-brown look. Bake the rolls for 20 minutes, or until they’re golden brown on top and sound soft but hollow when tapped. Brush the tops with a little butter while they’re hot for that glossy, bakery-style finish.
Serving Ideas
These rolls are absolutely dreamy with:
- Butter and honey
- Homemade jam
- Soups and stews
- Holiday dinners
- Sliders
- Breakfast sandwiches
- Or… warm straight out of the pan (no judgment)
Make-Ahead Tips
If you’re cooking a full holiday spread or living a more off-grid lifestyle, there are multiple ways I simplify the process:
- Feed your starter the night before. Make the rolls all in one day, starting in the morning. I can usually have them done within 6-8 hours. To speed up the rising process, I put the dough and the rolls in the oven with the light on.
- Let the dough rise overnight – Once you make the dough, you can put it in the fridge and let it slowly rise in the fridge overnight. The next day you can shape them into rolls, let them rise again before baking.
- Let the rolls rise overnight – Once you have the rolls shaped and ready to rise, throw them in the fridge to rise slowly overnight. The next day, pull them out of the fridge to warm them up to room temperature and then bake them right before you’re ready to eat.
Final Thoughts
These sourdough dinner rolls are one of the easiest and most impressive things you can bake from scratch. They’re simple, comforting, and reliable, the kind of recipe you’ll make again and again.
This year, they brought joy to everyone around the table at our potluck, and I hope they bring the same warmth to yours.
If you make them, let me know. I’d love to hear how they turned out!
More Recipes You’ll Love

Sourdough Dinner Rolls
This is the recipe I used to make soft and fluffy sourdough dinner rolls for our thanksgiving potluck and boy did everyone LOVE it!
Ingredients
Equipment
Dough
- 300g Water (Warm or Room Temp)
- 150g Sourdough Starter (Active)
- 16g Honey
- 1 Large Egg
- 42g Butter (melted. Aprox 4 TBSP)
- 1 1/4 Tsp Salt
- 580g All Purpose Flour
Finishing Touches
- 1 Egg (Optional)
- 1 Tbsp Butter (Optional)
Instructions
Mix the Dough
- In a Medium size bowl, combine your water, active starter, honey, egg, and melted butter.
- Stir until it's all dissolved.
- Add salt and flour.
- Mix until everything is combined and it forms a slightly sticky dough.
- Knead by hand or in a stand mixer for 5-8 minutes. The dough should still be slightly sticky.
First Rise
- Cover and let the dough rise until double in size.
- Depending on starter strength and temperature of your kitchen this could take anywhere from 3-6 hours.
- To speed this process up I usually stick my dough in the oven with the light on. To slow down this process you can still it in the fridge overnight.
Shape the Rolls
- Lightly flour your hands and divide the dough into equal portions. I usually aim for 12-15 rolls, depending on what size rolls you prefer.
- Shape each piece into a smooth ball by tucking the edges under to create a smooth top.
- Place the rolls in a greased or parchment lined dish with sides an. I use a casserole dish.
Second Rise
- Let the rolls rest until puffy and doubled in size.
- This is the secret to getting that ultra-light, tender texture.
Bake
- Preheat the oven to 375 Degrees.
- Brush the tops of the rolls with an egg wash to get that nice golden-brown look to your rolls.
- Bake for 20 minutes or until the tops are golden brown on top and sound soft but hollow when tapped.
- Brush the top with butter while they are still hot to get that glossy, bakery-style finish.
Notes
Make Ahead Tips:
- Feed your starter the night before. Make the rolls all in one day, starting in the morning. I can usually have them done within 6-8 hours. To speed up the rising process, I put the dough and the rolls in the oven with the light on.
- . Let the dough rise overnight - Once you make the dough, you can put it in the fridge and let it slowly rise in the fridge overnight. The next day you can shape them into rolls, let them rise again before baking.
- Let the rolls rise overnight - Once you have the rolls shaped and ready to rise, throw them in the fridge to rise slowly overnight. The next day, pull them out of the fridge to warm them up to room temperature and then bake them right before you're ready to eat.
Want more from-scratch recipes that are lightweight, shelf-stable, and perfect for off-grid or everyday cooking? Grab my Free From Scratch Pantry System. It’s filled with the pantry shortcuts I use every single week.