

There is a version of summer that does not require a grocery store run.
Curtis would eat ice cream in a snowstorm if you put it in front of him. It is one of his defining characteristics, and honestly one of the reasons I love him.
For a long time that meant buying the store-bought stuff even though I knew exactly what was in it. Refined sugar, corn syrup, carrageenan, artificial flavors, and a list of stabilizers I could not pronounce. I kept buying it because I had not figured out how to make the real thing work at home.
I tried no-machine methods. Blended frozen fruit. The kind with ice and rock salt packed around the outside. All of it made something closer to a slushy or a frozen brick than actual creamy ice cream. I was frustrated and Curtis was very patient about it, which somehow made it worse.
Then one Christmas he gave me the ice cream bowl attachment for my stand mixer. I made vanilla first. He took one bite and said “that’s the best one yet.” I tweaked it slightly. He said “this is better than store-bought.” We have not bought a single carton since.
Six real ingredients. One bowl. About 30 minutes of hands-off churning time. This is that recipe.
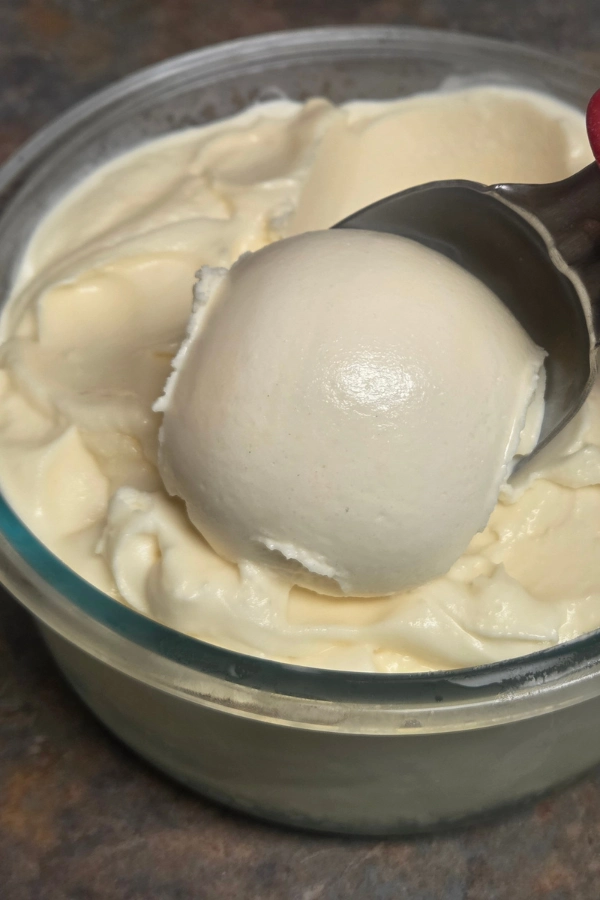
Why Store Bought Ice Cream Is Worth Replacing
Most commercial vanilla ice cream lists “cream, skim milk, sugar” at the top and then immediately follows with corn syrup, mono and diglycerides, carrageenan, and artificial flavor. The artificial flavor is doing a lot of heavy lifting on something that should just taste like vanilla.
When you make it at home you get actual heavy cream, real milk, a fresh egg, real vanilla extract, and nothing else. The texture is creamier because there are no gums or stabilizers working overtime to hold it together. It tastes like vanilla because there is real vanilla in it.
It also costs less per batch than a quality pint from the store, especially if you already have the equipment.
What You Need to Make This
Equipment
This recipe requires a KitchenAid stand mixer with the ice cream bowl attachment. I know that’s a specific ask and I want to be honest about why.
I tried every other method before landing here. No-machine methods give you something icy and coarse. Cheap ice cream makers work okay but they’re bulky, they need rock salt, and in my experience they break. The stand mixer bowl attachment is compact, stores in the freezer until you need it, and produces the smoothest, creamiest result I’ve ever made at home. If you already have a KitchenAid mixer, the attachment is the only extra piece you need.
If you don’t have a stand mixer, this particular recipe won’t work the same way. But if you’re on the fence about getting one, I’ll say this: I’ve used mine for ice cream, bread dough, pasta, whipped cream, and about a hundred other things. It earns its counter space.
The One Prep Step You Cannot Skip
Your ice cream bowl needs to go in the freezer for at least 26 hours before you use it. Not 12. Not overnight. 26 hours minimum. If the bowl isn’t completely frozen solid all the way through, your ice cream mixture will never fully churn into ice cream. It will just spin around and stay liquid.
I keep my ice cream bowl in the freezer permanently so it’s always ready. It takes up about as much space as a large mixing bowl and saves me from ever having to plan ahead.
Ingredients
- 1/2 Cup Sugar
- 1 1/2 tbsp Flour
- 1 1/4 Cup Milk
- 1 Egg
- 1/2 Tbsp Vanilla Extract
- 1 Cup Heavy Cream
That’s it. Six ingredients, all real, nothing you need to look up.
What to Look for in Real Vanilla Extract
This one deserves its own section because it changes the recipe more than any other ingredient.
The label should say two things: vanilla bean extractives and alcohol. That is it. If it says “artificial flavor” or “vanillin” anywhere, put it back.
Imitation vanilla is made from synthetic vanillin, which is a byproduct of the wood pulp industry. It technically smells like vanilla. But in a recipe where vanilla is literally the entire flavor profile, you will taste the difference immediately.
Real vanilla extract costs more. A small bottle of the good stuff runs around $8-12 and lasts a long time because you only use small amounts. In a recipe this simple, the quality of that one ingredient is the difference between good ice cream and ice cream people ask you to make again.
This is the vanilla I use. I have been buying it for a couple years and I keep going back to it.
How to Make It
Step 1: Make the base In a medium saucepan, combine the sugar, flour, and milk. Whisk over medium heat until the sugar is fully dissolved and the mixture is smooth. Bring it to a soft boil, whisking the whole time so nothing sticks to the bottom.
Step 2: Add the egg Whisk your egg smooth in a separate small bowl. Slowly pour the egg into the hot milk mixture while whisking constantly. You want to temper the egg into the mixture without scrambling it. Keep whisking until everything is fully combined. Take it off the heat.
Step 3: Cool completely This step matters. Pour your base into a bowl and let it cool to room temperature, then transfer it to the fridge if you want to speed things up. The mixture needs to be fully cold before it goes into the ice cream bowl or it won’t churn properly.
Step 4: Add the cream and vanilla Once your base is completely cold, whisk in the heavy cream and vanilla extract until everything is well combined.
Step 5: Churn Attach your frozen ice cream bowl to your stand mixer. Pour in the ice cream mixture. Attach the ice cream paddle and set your mixer to the stir setting. Let it run for about 30 minutes. You’re looking for a thick, soft serve consistency. It should hold its shape when you scoop it but still be soft.
Step 6: Freeze Transfer your ice cream to an airtight freezer safe container and freeze for at least 2 hours before serving. This firms it up from soft serve to scoopable ice cream.
The Secret to Getting the Texture Right
There is one thing nobody tells you about homemade ice cream without stabilizers, and it is this: the temperature of your base when it hits the bowl matters as much as the bowl being frozen.
Here is what works consistently:
After you pull the base off the heat, pour it into a shallow bowl or a wide glass container instead of something deep. Shallow means more surface area and faster cooling. Let it come to room temperature on the counter, then transfer it to the back of the refrigerator, which is the coldest part. Give it at least two hours, but overnight is better.
When the base is fully cold, it will be slightly thick. Not solid, but not totally liquid anymore. That is what you want going into the bowl.
One more thing: the moment you pour the base in, start the mixer right away. Do not let it sit in the frozen bowl before churning starts. The outside layer will freeze solid against the bowl wall before the rest of it has a chance to churn, and you will end up with a frozen ring and liquid center.
A note on the heating step: I follow the full stovetop method in this recipe because cooking the egg into the base gives you a custard-style ice cream that is noticeably richer and creamier. If you want to experiment once you are comfortable with the recipe, you can try blending everything together cold and going straight to churning, some people do it that way and it works. But if it is your first time, follow the full method. The texture is worth it.
Troubleshooting: What Went Wrong
It stayed liquid after 30 minutes of churning. Your bowl wasn’t frozen solid enough. Put the bowl back in the freezer for another 24 hours and try again with a fresh batch. This is almost always the culprit.
It’s more like a slushy than ice cream. Same issue. The bowl wasn’t cold enough to churn the mixture properly, or your base was still slightly warm when you added it.
It froze rock solid and is impossible to scoop. Let it sit on the counter for 5 minutes before scooping. Homemade ice cream without stabilizers freezes harder than store bought. A few minutes at room temperature and it scoops perfectly.
It tastes a little flat. Add a tiny pinch of salt to your base next time. Salt amplifies sweetness and rounds out the vanilla flavor without making it taste salty. I use Baja Gold Mineral Salt for everything.
Serving Homemade Ice Cream the Right Way
Homemade ice cream without stabilizers freezes harder than store-bought. This is actually a sign it is real food. But it means you need to plan ahead slightly when you serve it.
Pull the container out of the freezer and let it sit on the counter for 5 minutes before scooping. That is genuinely all it takes. After 5 minutes it scoops clean, holds its shape, and has a texture that is silkier than anything that comes out of a carton.
A few things that make it better:
A warm scoop makes the whole thing easier. Run your ice cream scoop under hot water for a few seconds before each scoop. It glides through without forcing it.
Serve it in a chilled bowl if you want it to hold longer. I just put a couple bowls in the freezer for a few minutes while I am letting the ice cream soften. Small thing, big difference if you are sitting outside in warm weather.
If you are serving it to a group, scoop it all out onto a sheet pan lined with parchment paper and put it back in the freezer while you get everything else ready. Then it is ready to serve all at once instead of standing there scooping while everyone waits.
What Goes Well With Homemade Vanilla Ice Cream
Vanilla is the most versatile base you can make. Here is what we reach for:
Warm brownies. This is the most obvious answer and it became obvious for a reason. The contrast between cold ice cream and a warm brownie straight from the pan is one of those small things that feels like a legitimate treat no matter where you are or what kind of day you are having.
Chocolate syrup. Sometimes the classic answer is the right one. A generous pour of chocolate syrup over a bowl of vanilla is simple and it is perfect. I actually have a homemade chocolate syrup recipe linked here that takes about 5 minutes to make and tastes so much better than the bottle. The two together are one of our favorite ways to eat dessert.
Apple bars. This is one I have made with Curtis in our tiny school bus oven and it is a combination I keep coming back to. Warm apple bars, cold vanilla ice cream. The cinnamon in the bars and the clean vanilla flavor play really well together. Highly recommend.
Carrot cake. Curtis’s favorite cake, full stop. I have made it in our school bus kitchen and it goes with homemade vanilla ice cream better than you would expect. The spice in the cake, the cream cheese frosting, the cold vanilla alongside it. That is a dessert.
Pie. Any pie you made yourself. Apple, cherry, peach, blueberry. The combination of a homemade crust and homemade ice cream is one of those things that genuinely tastes better than most restaurants.
A drizzle of good honey. If you are keeping it simple, a little raw honey over a scoop is quiet and perfect and requires no cleanup.
Flavors to Try Next
Once you have made vanilla twice and it feels easy, this base goes in a dozen different directions. These are the variations we keep coming back to:
Strawberry. This is Curtis’s favorite variation after vanilla. I use powdered strawberries. Either dehydrated or freeze dried and blended to a fine powder and fold them in right before churning. If the powder clumps, I usually throw them in a blender real quick to break them up. Fresh strawberries work beautifully too, just mash them well until they are almost a puree. Whatever you do, do not use frozen strawberries. The water content is too high and instead of creamy you get icy and crystalized. Powdered or fresh only.
Chocolate. Replace 2 tablespoons of the flour with 2 tablespoons of unsweetened cocoa powder and add it to the saucepan with the sugar and milk. The cocoa blooms in the heat and the flavor goes deep.
Coffee. Dissolve a tablespoon of instant espresso powder into the milk before you start heating it. The flavor goes all the way through. This one is for mornings when you want to pretend a bowl of ice cream is breakfast, which I fully support.
Peach. Peel and dice two ripe peaches, mash them slightly, and fold them in just before churning. If you want the fruit pieces more evenly distributed, you can blend the peach smooth and whisk it in with the cream. I have also used powdered peaches, and it turns out delicious.
Mint chip. Add half a teaspoon of peppermint extract in place of the vanilla and fold in a handful of mini chocolate chips right at the end of churning, when the mixture is already thick. The chips set up hard in the cold and you get that satisfying crunch in every bite.
A note on all of these: if you are adding fresh fruit, taste your base before churning and consider adding a little extra sugar. Fruit dilutes sweetness slightly and you want the final product to be balanced.
Each one uses the exact same process. The base is the skill. Once you know it, you have a dozen recipes.
How Long Does Homemade Ice Cream Last
Homemade ice cream doesn’t have the stabilizers and preservatives that keep store bought ice cream fresh for months. Plan to eat it within two weeks for the best texture and flavor.
After two weeks it’s still safe to eat but the texture can start to get slightly gummy or icy as moisture moves around inside the container. It won’t hurt you, it just won’t be as good. Curtis has eaten month-old ice cream and lived to tell about it, but we don’t recommend it.
The best container for storing it is an airtight glass container with a snap-on lid. Glass doesn’t absorb freezer smells the way plastic does and it keeps the texture better. This is the container I use, and it holds exactly 4 cups which is perfect for this recipe.
Can You Freeze Dry Homemade Ice Cream?
This is something I have been genuinely curious about, and I am going to be honest that I have not tried it yet with this recipe. But I plan to.
Freeze dried ice cream is real. You have probably seen those crunchy, chalky ice cream sandwiches at camping stores or gas stations. That is exactly what it is. Ice cream with the moisture removed so it is shelf stable and does not need refrigeration.
The process with a home freeze dryer would be to freeze your finished ice cream in thin slabs on a sheet pan, then run it through the freeze dryer. The end result should be crunchy, concentrated, and shelf stable. Ideal for packing into a bag for camping without any cooler needed.
One thing I am not sure about: whether you can rehydrate freeze dried ice cream back into actual ice cream. My instinct is that adding water would give you something more like a runny liquid than a creamy ice cream, and you would probably need to refreeze it and even then, I am not certain the texture would hold. If you have tried this, I genuinely want to know how it turned out. Drop a comment below.
I have heard that the freeze-dried ice cream you eat straight as a crunchy snack is delicious, and that is probably how I would use it.
If you want to try freeze drying at home, this is the freeze dryer I use. It is a significant investment but if you are serious about real food that goes anywhere with you, it changes the game. My post on the best foods to freeze dry is a good place to start if you are curious.
Making This Recipe for a Group
You can double this recipe and it will still fit in the ice cream bowl. That gives you about 8 cups, which is enough for a solid group dessert.
If you need more than that, do it in batches. After your first batch, rinse the bowl, put it back in the freezer, and wait at least a few hours before making the next one. The bowl has to be fully frozen again to work.
Plan ahead if you are making this for a gathering. I’d make your batches a couple days before, let them firm up overnight in the freezer, and pull them out 5 minutes before serving.
What My Mom Would Have Done With This Recipe
I grew up with parents who made things from scratch because they had to. Not as a trend, not as a philosophy. Because money was tight and you fed your family with what you had.
My mom made desserts the way she made everything else. She figured out what worked with the ingredients available, she did not measure everything perfectly, and she made it taste good anyway. I did not understand until I was older how much skill that actually took.
This vanilla ice cream is the kind of recipe she would love. Simple ingredients that most people already have. No fancy equipment beyond what you can justify once and use forever. Something that tastes real because it is real.
There is something about being able to feed people well with a handful of ingredients and a skill you just know that feels like carrying something forward.
That is what this recipe is, at its core. Not just ice cream. A skill that goes with you.
Do you want to eat real food no matter where life takes you? My free Adventure Ready Guide covers how to feed yourself well on any adventure and pack only what you actually need. It is everything I figured out the hard way across 16 national parks so you do not have to.
What I Actually Use
- KitchenAid Stand Mixer – the one piece of equipment that makes this recipe work.
- Ice Cream Bowl Attachment – fits KitchenAid mixers, store it in the freezer so it’s always ready.
- Glass freezer container with snap lid – holds exactly 4 cups, no freezer smell absorption.
- Baja Gold Mineral Salt – a pinch in the base makes the vanilla flavor pop.
Conclusion
If you have been buying store-bought ice cream for the same reason I was, which is that you assumed homemade would be complicated or disappointing, I want to tell you it is neither.
This recipe takes about 15 minutes of active work. The rest is waiting. And the result is something that tastes like a real ingredient list instead of a chemistry experiment.
Curtis still takes the first bite every time I make a new variation. He still says some version of “that’s good.” After everything we have figured out together on the road, in national park housing, in a hand-built school bus kitchen with a two-burner stove, that response means something to me. The simple stuff usually does.
Make it once. Adjust the vanilla to your taste. Try one of the variations. Get comfortable with the base and make it your own.
What flavor variation are you going to try first? Drop a comment below and tell me, or if you have made vanilla and have a twist that worked really well, I genuinely want to hear about it.
With love and adventure, Mindy
📌Pin it for Later
Homemade Vanilla Ice Cream From Scratch
The creamiest homemade vanilla ice cream made with 6 real ingredients and a stand mixer ice cream bowl attachment. No preservatives, no artificial flavors, better than store bought.
Ingredients
- 1/2 Cup Sugar
- 1 1/2 tbsp Flour
- 1 1/4 Cup Milk
- 1 Egg
- 1/2 Tbsp Vanilla Extract
- 1 Cup Heavy Cream
Instructions
- Make sure your ice cream bowl has been in the freezer for at least 26 hours before starting.
- In a medium saucepan, combine sugar, flour, and milk. Whisk over medium heat until sugar is dissolved and mixture reaches a soft boil.
- Whisk egg smooth in a small bowl. Slowly pour egg into the hot milk mixture while whisking constantly. Whisk until combined. Remove from heat.
- Let the base cool completely to room temperature, then refrigerate until fully cold.
- Once cold, whisk in heavy cream and vanilla extract until well combined.
- Attach frozen ice cream bowl to stand mixer. Pour in ice cream mixture and attach ice cream paddle.
- Set mixer to stir speed. Churn for approximately 30 minutes until mixture reaches a soft serve consistency.
- Transfer to an airtight freezer safe container and freeze for at least 2 hours before serving.
Notes
- The ice cream bowl must be frozen solid for at least 26 hours or the mixture will not churn properly.
- Let ice cream sit at room temperature for 5 minutes before scooping if it's frozen too hard.
- Best eaten within 2 weeks for optimal texture.
- A pinch of salt in the base amplifies the vanilla flavor. I use Baja Gold Mineral Salt.
- Storage container I use: Glass freezer container with snap lid
- Stand mixer I use: KitchenAid Stand Mixer
- Ice cream bowl attachment: Ice Cream Bowl Attachment
- Want to build a from scratch pantry? Get my FREE From Scratch Pantry Guide