

I have never liked not knowing what’s actually in something I’m about to eat, or handing someone else the decision of what goes into my body.
That’s not a small thing for me. Growing up, a lot of what showed up on our table was decided by things outside our control, what we could afford that week, what was on sale, what was left. I didn’t get a say in it back then. Now I do, and I take that seriously in ways that probably look excessive to people who haven’t lived it.
Country gravy packets were a small, boring example of handing that control back over without even noticing. I’d grab one, dump it in, never think twice, mostly because I finally could afford not to think about it. Then one day I actually flipped one over and read the label. Modified food starch. Sodium caseinate. Disodium inosinate. For something that is just flour, fat, and liquid.
I made my own batch that same afternoon and never bought the packets again.
This mix takes about two minutes to put together, stores for up to a year in a sealed jar, and makes gravy in under five minutes whenever you need it. It is one of the most practical dry mixes you can have in a pantry that moves with you or lives in a small space.
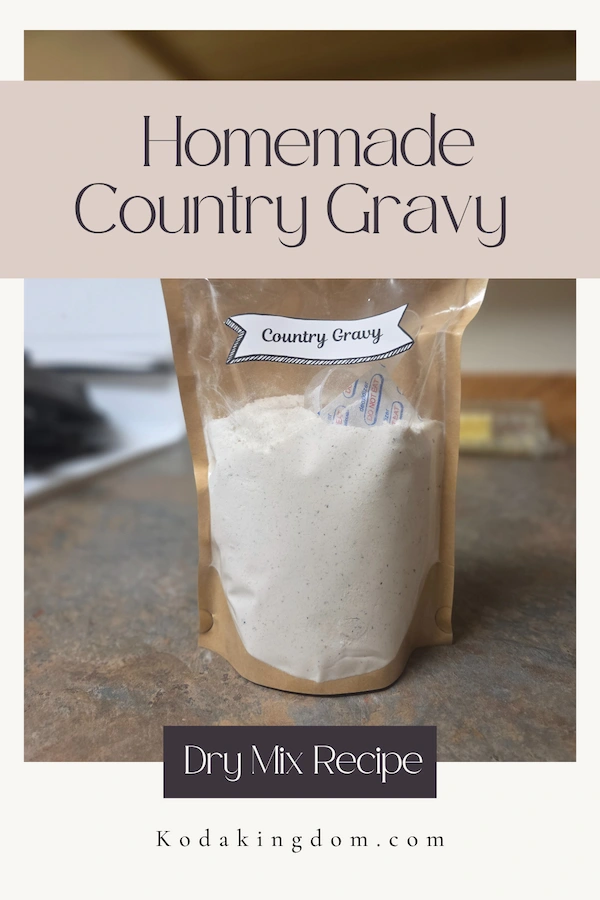
Country gravy mix in a nutshell: Mix flour, powdered milk, and a few pantry spices once, store it in an airtight jar, and you have a homemade dry base for classic white or country gravy anytime. Melt 2 tablespoons of fat, whisk in 3 tablespoons of mix, then slowly add 1 cup of water or milk and cook until thickened. Takes about 5 minutes start to finish, and the dry mix itself stores for up to a year.
What Is Country Gravy?
Country gravy is a white or cream-based gravy made without meat drippings. It is sometimes called white gravy, milk gravy, or sawmill gravy depending on where you grew up.
It is the gravy you spoon over biscuits in the morning, pour over fried chicken, or use to stretch a simple meal into something more satisfying. Unlike brown gravy which is built on beef drippings and stock, country gravy is built on a simple roux of fat and flour cooked in milk or water. That simplicity is exactly what makes it so easy to make from a dry mix.
This version uses powdered milk in the mix so you do not even need fresh milk on hand. Water works just fine, which makes it genuinely useful for camping, travel, or those weeks when the fridge is running low.
Why Make It From Scratch?
A few real reasons this is worth doing once, and none of them are really about gravy.
- You know exactly what is in it. The Great Value country gravy packet we compared in our homemade dry mixes cost breakdown costs $1.42 and contains ingredients that take up three lines of text on the label. This mix has seven ingredients, all of which you can pronounce.
- It is significantly cheaper per batch. Store-bought runs about $1.42 per batch. Homemade runs $0.25 to $0.40. Over the course of a year if you make gravy regularly, that adds up to real money.
- It stores beautifully in small spaces. One jar of this mix makes 16 servings of gravy and takes up about as much space as a standard spice jar. No cans, no packets, no wasted packaging.
- It works without refrigeration. When you are camping, living in a vehicle, or working a seasonal job where your kitchen is limited, a dry mix that only needs fat and water is worth its weight in gold.
No store run required, no waiting on someone else’s shelf to be stocked. That part matters to me more than the gravy does.
The Dry Mix Ingredients
(These go in a jar and store for up to a year)
- 2 cups all-purpose flour
- 1 cup powdered milk
- 1/4 cup cornstarch
- 1 tablespoon ground black pepper
- 1 tablespoon sea salt
- 1 tablespoon onion powder
- 1 teaspoon poultry seasoning
Mix all ingredients together thoroughly and store in an airtight container. That is the entire process for the mix itself.
How to Make the Gravy
(Per 1 cup of finished gravy)
- 2 tablespoons lard or butter
- 3 tablespoons homemade country gravy mix
- 1 cup water
- Melt the lard or butter in a small saucepan over medium heat.
- Add 3 tablespoons of the dry mix and stir until it forms a paste. This is your roux. Let it cook for about 30 seconds so the flour loses its raw taste.
- Slowly pour in the water or milk a little at a time, whisking constantly as you add it. Adding liquid slowly is what prevents lumps.
- Continue whisking over medium heat for 2 to 3 minutes until the gravy thickens to your liking.
- Taste and adjust salt and pepper as needed.
The gravy thickens as it cooks and continues to thicken slightly as it cools, so pull it off the heat just before it reaches the thickness you want.
Troubleshooting Common Gravy Problems
Gravy goes wrong in a few predictable ways. Here is how to fix each one.
Lumpy gravy: lumps almost always happen from adding liquid too fast or not whisking consistently. If you already have lumps, you have two options. Pour the gravy through a fine mesh strainer and return it to the pan, or hit it directly in the pan with an immersion blender for about 30 seconds. The immersion blender is faster and works surprisingly well. It will not make the gravy perfectly silky like a cream sauce, but it breaks up the lumps and gets you a smooth, pourable result without losing any of the batch. To prevent lumps next time, add the liquid in a slow steady stream while whisking the whole time.
Gravy too thin: keep cooking over medium heat and whisk continuously. The gravy will thicken as the flour cooks and the liquid reduces. If it is still too thin after a few minutes, mix one additional tablespoon of the dry mix with a small splash of cold water to make a slurry, then whisk that into the gravy.
Gravy too thick: add more water or milk a tablespoon at a time and whisk until you reach the right consistency.
Gravy tastes like raw flour: the roux did not cook long enough before you added the liquid. Next time let the paste cook for a full 30 to 60 seconds before adding any liquid. If the batch is already made, keep cooking it over low heat for another few minutes and the raw flour taste will cook out.
Gravy not flavorful enough: add more salt and black pepper first. If it still needs more, a small splash of Worcestershire sauce or a pinch of garlic powder rounds out the flavor without changing the character of the gravy.
Variations Using the Same Base Mix
One batch of this dry mix is the starting point for several different gravies. Here is how to adapt it.
Sausage gravy: brown a handful of breakfast sausage crumbles in the pan before making the roux. Leave the sausage in the pan, add the butter and mix, and proceed as normal. The sausage flavor goes into the whole gravy.
Mushroom gravy: saute sliced mushrooms in butter until golden before adding the dry mix. Use the mushroom butter as your fat base for the roux.
Chicken gravy: use chicken broth instead of water for a richer flavor. A pinch of extra poultry seasoning deepens it further.
Spicy white gravy: add a pinch of cayenne or a few dashes of hot sauce at the end. Good over fried chicken or biscuits when you want something with a little heat.
Dairy-free version: to make a fully dairy-free mix, replace the powdered milk in the dry mix with coconut milk powder or almond milk powder. Both are real products available online and in most health food stores. Coconut milk powder works especially well in savory recipes and gives the gravy a slightly richer body without any detectable coconut flavor once it is cooked into the roux. Almond milk powder is a lighter option if you prefer. Either way, use a neutral oil instead of butter when making the gravy and use water or your preferred non-dairy milk as the liquid. The result is a fully dairy-free country gravy that works the same way as the original.
How to Store the Dry Mix
For everyday pantry storage: transfer the mix to a clean, dry glass mason jar and seal tightly. Store in a cool, dark place away from heat sources. A vacuum-sealed mason jar removes the oxygen that causes mixes to go stale and extends shelf life significantly. Stored this way the mix stays fresh for up to a year.
For travel and on-the-road storage: divide the mix into smaller portions in zip-lock bags or small airtight containers so you can take only what you need without bringing the whole jar. Label each bag with the amount needed per serving so you are not guessing in the field.
For longer-term storage: seal in mylar bags with oxygen absorbers for storage up to 2 to 3 years. This is worth doing if you make a large batch from bulk flour purchases.
Label everything with the date you made it. The mix does not go bad quickly but it does lose potency over time, and knowing when you made it helps you rotate stock properly.
What to Serve With Country Gravy
Country gravy is one of those things that makes a simple meal feel complete. Here is where it earns its place in a camping kitchen or a small-space pantry:
- Spooned over homemade biscuits made with your pantry staples
- Poured over mashed potatoes
- Used as a sauce base for a quick skillet meal with whatever protein you have on hand
- Mixed into rice for a creamy one-pan dinner
- Served over freeze dried or dehydrated vegetables rehydrated in the same pan
When you are working with a two-burner camp stove and limited ingredients, a jar of this mix in your kit means you can turn almost anything into a real meal.
Free Resource
If cooking from scratch still feels chaotic more often than not, it’s usually a pantry system problem, not a skill problem. I put together a free guide that walks through exactly how I set mine up so the ingredients are always there when I need them. It’s called the From-Scratch Pantry Starter Guide, grab it below.
Frequently Asked Questions
How long does homemade country gravy mix last? Stored in an airtight container in a cool, dark place, this mix lasts up to 12 months at full quality. Vacuum-sealed jars extend shelf life further. Sealed in mylar bags with oxygen absorbers, you are looking at 2 to 3 years.
Can I make this mix without powdered milk? Yes. Leave the powdered milk out of the dry mix and use fresh milk instead of water when you make the gravy. The result is the same, you just lose the convenience of only needing water in the field.
Can I use this mix to make gravy without meat drippings? Yes, that is exactly what it is designed for. Butter or lard replaces the drippings entirely. The result is a classic white country gravy with no meat required.
What is the difference between country gravy and white gravy? They are essentially the same thing. Country gravy and white gravy both use a flour-based roux cooked in fat with milk or water. Some people use the terms interchangeably. Sawmill gravy is another regional name for the same recipe. The common thread is a creamy, pale gravy without meat drippings as the base.
Can I make this mix gluten-free? Yes. Substitute a 1-to-1 gluten-free flour blend for the all-purpose flour and use a gluten-free cornstarch (most cornstarch already is). The result will be slightly different in texture but still works well.
Does country gravy reheat well? Yes, with a little attention. Reheat over low heat and add a splash of water or milk to loosen it back up as you stir. Gravy thickens significantly as it sits and cools, so expect to thin it slightly when reheating.
Can I make a bigger batch of this mix? Absolutely. The recipe scales up easily. Double or triple the batch and store it in a large mason jar or divide into smaller portions for easy travel packing. The ratios stay the same at any scale.
Can I use dried buttermilk instead of powdered milk? Yes, and it’s worth trying if you grew up on the tangier, more traditional version of country gravy. Swap it in 1-for-1 for the powdered milk in the dry mix. The flavor leans closer to old-fashioned sawmill gravy.
Conclusion
Gravy should not come from a packet with a paragraph of ingredients on the back.
It should come from a jar in your pantry that you made yourself in two minutes from things you already have. That is the kind of pantry that does not stress you out, does not waste money, and does not let you down when you are tired and hungry at the end of a long day outdoors.
This mix is one of those small things that makes a real difference. It’s a small, boring way of taking a little more control back, one pantry item at a time. Make a batch this weekend and tuck it away. You will reach for it more than you expect.
With love and adventure,
Mindy
What do you serve country gravy over most? Drop a comment below. I am always curious what people are cooking out there.
Related Posts
- Cream of Soup Base
- Small Apartment Pantry System
- How Much Food to Stock for 6 Months
- Homemade Baking Powder

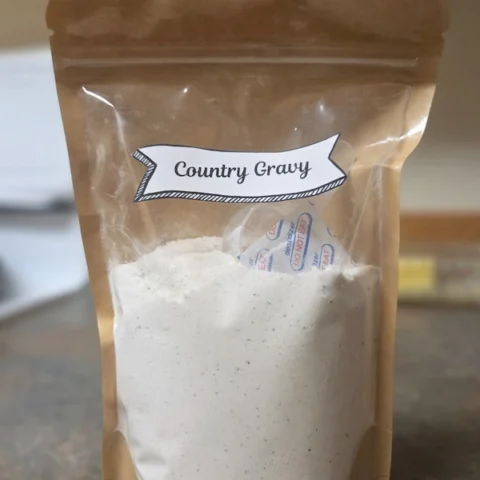
Homemade Country Gravy Mix
A simple homemade country gravy dry mix made from seven pantry staples. Make one batch and have gravy ready in under 5 minutes anytime you need it.
Ingredients
- 2 cups Flour
- 1 cup Milk Powder
- 1/4 cup Cornstarch
- 1 Tbsp Black Pepper
- 1 Tbsp Salt
- 1 tbsp Onion Powder
- 1 Tsp Poultry Seasoning
- 2 Tbsp Lard or Butter
- 3 Tbsp of Homemade Gravy Mix
- 1 Cup of water or Milk
Instructions
To make the dry mix
- Combine the flour, powdered milk, cornstarch, black pepper, salt, onion powder, and poultry seasoning.
- Mix the ingredients until well combined.
- Store the Homemade Gravy Mix in an airtight container in a cool dark place. I like to put an oxygen absorber in the dry mix to make it stay fresh longer.
To make the mix into gravy
- Melt 2 Tbsp of lard or butter in a saucepan over medium heat.
- Add 3 Tbsp of Country Gravy Mix. Stir until it becomes a paste.
- Gradually add 1 cup of water or milk. Use a whisk to make sure there are no lumps.
- Cook for 3 minutes while whisk continuously until it reaches the desired thickness.
Notes
- Add the liquid slowly while whisking constantly to prevent lumps.
- The gravy thickens as it cooks and continues to thicken as it cools, so pull it off heat just before it reaches your desired thickness.
Nutrition Information:
Yield: 1 Serving Size: 1Amount Per Serving: Calories: 2622Total Fat: 35gSaturated Fat: 20gUnsaturated Fat: 15gCholesterol: 81mgSodium: 7553mgCarbohydrates: 506gFiber: 23gSugar: 3gProtein: 68g
This recipe contains dairy (Milk)