
The first time I tried to figure out how much food we needed for six months, I Googled it.
Google told me to buy 100 pounds of rice.
We eat rice about three times a week. There are roughly 200 cups of rice in a 100-pound bag. We would have had to eat rice every single day for 200 days to get through it. That number was completely wrong for us, and it is probably wrong for you too.
Here is what actually works: building a six-month food supply based on what you and your family genuinely eat, calculated from your real consumption patterns, and stored in a way that fits your actual space. Not a survivalist bunker. Not a one-size-fits-all kit. A real pantry that you rotate through, cook from, and actually use.
This is exactly how I built ours from a school bus kitchen, and it works just as well in a small apartment, a seasonal rental, or a house with a real pantry.
How much food does one person need for 6 months? A general starting point for one adult is: 25-50 lbs of grains (flour, oats, rice, pasta), 15-25 lbs of legumes (beans, lentils), 10-15 lbs of sugar and honey, 5-10 lbs of fats and oils, 5-10 lbs of salt and basic seasonings, plus canned or preserved proteins and fruits and vegetables based on your actual eating habits. These numbers are a starting framework. Your real amounts will be higher or lower depending on what your family eats, how you cook, and how many people you are feeding.
Why Most 6-Month Food Storage Guides Get It Wrong
Most guides online are built around generic survival rations, not real cooking. They assume you are surviving, not eating. They tell you to buy bulk quantities of things you barely use and ignore the things you cook with every single week.
The result is a pantry full of 50-pound bags of hard red wheat that you do not know how to mill, canned goods that expire before you touch them, and none of the actual ingredients you need to make the food your family will eat.
The method that actually works starts with your own kitchen. What you already cook, how often you cook it, and what runs out fastest. From there you scale up, not down from some generic list.
Step 1 – Track What You Actually Use
This is the step most people skip and it is the most important one.
Before you buy anything extra, spend two to four weeks tracking what you go through. Every time you open a new bag of flour, write down the date. When you finish it, write that down too. Same for oats, rice, pasta, canned goods, oil, sugar, salt, and everything else.
This does not have to be complicated. A notepad on the counter works. A note in your phone works. The goal is simple: figure out how long one unit of each item lasts your household.
Once you know that a 5-pound bag of flour lasts your family three weeks, the math for six months becomes easy. Six months is roughly 26 weeks. 26 weeks divided by 3 weeks per bag equals about 9 bags. Buy 10 to have a buffer.
That is the entire system. Track, calculate, add a buffer.
I created a free pantry tracking system to help you do this. You can grab it here: Free From Scratch Pantry System
Step 2 – Start With the Most Versatile Pantry Staples
While you are tracking, start building from your most used and most versatile ingredients first. These are the items that show up in almost every meal. The ones that let you make bread, biscuits, pancakes, pasta, soup bases, and dozens of other things from scratch.
Grains and starches are your foundation. For most households this means flour, oats, rice, cornmeal, and pasta. These are calorie-dense, shelf-stable, and flexible enough to anchor dozens of different meals.
Fats are next. Think butter, coconut oil, olive oil, and shortening. Everything from sauteing vegetables to making biscuits to baking cookies runs on fat. Running out of fat means your cooking options collapse fast.
Sweeteners matter more than people expect. Sugar, honey, and maple syrup are not just for desserts. They are used in bread, marinades, sauces, ferments, and preserving. Stock more than you think you need.
Proteins depend heavily on your household. Dried beans and lentils are the most cost-effective and shelf-stable. Canned meats like tuna, salmon, and chicken add variety without refrigeration. If you have a Harvest Right freeze dryer, freeze dried meats can be stored for 25+ years and rehydrate back to nearly fresh.
Leavening and seasonings are easy to underestimate. A pantry without baking powder, baking soda, yeast, salt, and basic spices is a pantry that produces boring, flat food. Homemade baking powder lasts longer than store-bought and is easy to make in bulk.
6-Month Food Storage Starter Chart (Per 2 Adults)
This is a baseline starting point, not a prescription. Adjust every number up or down based on your actual tracking data from Step 1.
| Item | Suggested Amount (2 Adults, 6 Months) | Notes |
|---|---|---|
| All-purpose flour | 50 lbs | Bread, biscuits, thickening |
| Rolled oats | 20 lbs | Breakfast, baking, thickening |
| White rice | 25 lbs | Side dishes, grain bowls |
| Pasta | 20 lbs | Quick meals |
| Cornmeal | 10 lbs | Cornbread, coating, porridge |
| Dried beans (mixed) | 20 lbs | Protein, soups, sides |
| Dried lentils | 10 lbs | Soups, fast-cooking protein |
| Sugar (white) | 15 lbs | Baking, preserving |
| Honey | 6 lbs | Sweetener, natural preservative |
| Salt | 10 lbs | Cooking, preserving |
| Baking soda | 3 lbs | Baking, cleaning |
| Baking powder | 2 lbs | Baking |
| Coconut oil or shortening | 6 lbs | Baking, high-heat cooking |
| Olive or vegetable oil | 2 gallons | Everyday cooking |
| Canned meats (tuna, chicken, salmon) | 48-60 cans | 2-3 per week |
| Canned or jarred tomatoes | 36 cans | Sauces, soups, bases |
| Canned beans (backup) | 24 cans | Quick meals |
| Apple cider vinegar | 2 gallons | Cooking, preserving |
| Soy sauce or coconut aminos | 4 bottles | Flavor base |
| Dried herbs and spices | Varies | Stock what you actually use |
| Powdered milk | 10 lbs | Baking when fresh milk unavailable |
| Yeast (instant dry) | 2 lbs | Bread |
Important: This chart is a starting place, not a final answer. The rice example from the beginning of this post proves why. Generic numbers are not your numbers. Use this as a framework and adjust based on your own consumption tracking.
Step 3 – Always Over-Calculate
Once you have your numbers, add a 15 to 20 percent buffer on top of everything.
The worst case scenario is you are slightly short of something important when you cannot easily get to a store. Running out of flour when you are snowed in, parked in a remote location, or in the middle of a longer stretch than expected is genuinely stressful. Having slightly too much is not.
I always prep for six months and then add a little extra, because none of us can see around the corner. Plans change. Seasons run longer than expected. Emergencies do not announce themselves. The buffer is not paranoia. It is just being realistic about the fact that we are human and our calculations are never perfect.
Step 4 – Preserve Food to Extend Your Supply
Dry goods from the store will get you a long way, but if you want to build a truly deep pantry that can carry you through a full six months and beyond, preserving your own food is where the real leverage is.
Dehydrating is the easiest entry point. A good dehydrator lets you preserve onions, garlic, potatoes, vegetables, fruits, and even ground beef at a fraction of the cost of buying dehydrated foods pre-made. Homemade dehydrated garlic powder costs almost nothing compared to store-bought and lasts for years. I have a full list of dehydrating recipes here if you want to dig in.
Freeze drying is the next level. A Harvest Right freeze dryer removes almost all moisture from food while preserving the nutrition, texture, and flavor better than any other preservation method. Freeze dried food sealed in mylar bags with oxygen absorbers can last 25 years or more. It is an investment upfront, but for anyone building a serious long-term pantry it is genuinely the best tool available. Here is how to get started with freeze drying at home.
Making from scratch is also preservation in a practical sense. When you know how to make homemade dry mixes like taco seasoning, baking powder, ranch mix, and cream of anything soup, you are storing the raw ingredients that make dozens of different meals instead of pre-made packets with short shelf lives. The raw ingredients store longer, cost less, and give you more flexibility.
How to Store Your 6-Month Food Supply
How you store everything matters as much as what you buy. Properly stored food lasts dramatically longer than food thrown into a cabinet in its original packaging.
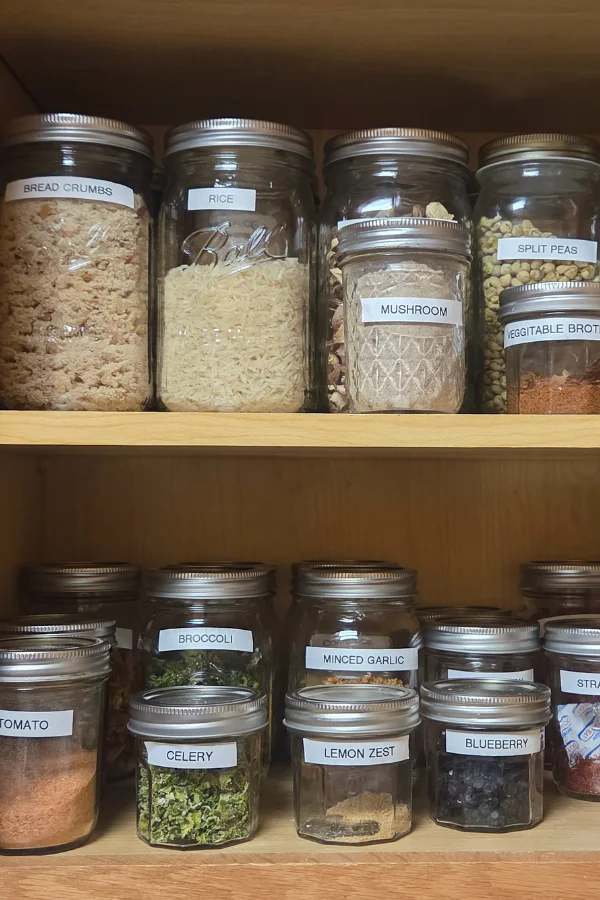
For everyday pantry items (up to 1 year): Mason jars with vacuum-sealed lids are the best everyday storage option. A handheld vacuum sealer pulls the air out of the jar after filling, which keeps moisture and oxygen out. Label every jar with the date so you are always rotating oldest stock first.
For medium-term storage (1 to 5 years): Mylar bags are your best option. They are lightweight, flexible, block light and moisture, and are far more durable in a vehicle or moving home than glass jars. Seal completely and store somewhere cool and dark.
For deep pantry long-term storage (5 to 25+ years): Add oxygen absorbers to your mylar bags before sealing. Oxygen is what causes food to oxidize and go stale over time. Absorbers eliminate it entirely. For grains, legumes, and dry goods sealed in mylar with oxygen absorbers, you are looking at decade-plus shelf life in a cool environment.
The two enemies of long-term food storage are moisture and oxygen. Control those two things and almost everything else takes care of itself.
What About Space? Building a 6-Month Supply in a Small Home
One of the most common objections to building a six-month pantry is space. Not everyone has a basement or a dedicated storage room. We certainly do not.
The good news is that a six-month food supply for two people does not require as much space as most people imagine. The entire dry goods portion, including grains, legumes, sugar, salt, and spices, fits into a surprisingly compact footprint when stored in stackable containers or mylar bags in totes.
A few approaches that work well in small spaces:
Under-bed storage is one of the most underused spaces in any home. Flat totes slide under a queen bed and hold a significant amount of dry goods. Label the outside so you know what is in each one without pulling them all out.
Vertical stacking in a closet or cabinet works well too. Stackable square containers use space more efficiently than round ones. Mylar bags inside cardboard boxes stack flat and are easy to label.
Rotate as you cook. The goal is not a separate survival cache. It is a working pantry that you actually cook from and replenish as you use things. A six-month supply is just your normal pantry, scaled up and organized intentionally.
If you are in an RV, school bus, or other small mobile space, focus on the highest-calorie and most versatile items first. Flour, oats, rice, oil, and beans. Build out from there. You do not need everything on the chart above. You need the things you actually cook with, in the amounts you actually use.
If you want a system that helps you track exactly what your household goes through and build your pantry intentionally, I put together a free guide with the tracking sheets and shopping lists I actually use.
Frequently Asked Questions
How much does a 6-month food supply cost? It depends entirely on what you already have and how you build it. Buying in bulk from warehouse stores and focusing on dry staples first, a six-month supply for two adults can be assembled for $500 to $1,500 over time. The key word is “over time.” You do not have to buy everything at once. Add a few extra items each grocery trip and you will have a solid supply built within a few months without one large financial hit.
What is the most important food to stockpile first? Start with what you already eat most. For most households that means flour, oats, rice, beans, oil, and salt. These are the foundation foods that everything else builds on. Once you have a solid base of versatile staples, fill in with proteins, canned goods, and specialty items.
How do I know if my stored food has gone bad? Trust your senses. Off smells, unusual colors, visible moisture or mold, and off textures are all signs that food has degraded. Properly sealed food in good storage conditions rarely goes bad before its estimated shelf life, but checking your stock a few times a year is good practice. Rotate oldest stock to the front and use it first.
Do I need special equipment to build a 6-month food supply? No. You can build a solid six-month pantry with nothing more than airtight containers and a cool, dark storage space. A vacuum sealer and mylar bags significantly extend shelf life and are worth having if you are building a serious long-term supply, but they are not required to get started.
How long does rice actually last in storage? White rice stored in an airtight container in a cool, dark environment lasts 4 to 5 years easily. White rice sealed in mylar bags with oxygen absorbers can last 25 to 30 years. Brown rice has a shorter shelf life of 6 to 12 months at room temperature because of its higher oil content. For long-term storage, white rice is the better choice.
Can I build a 6-month food supply if I live in a small space? Yes. Focus on the most calorie-dense and versatile items first, like grains, legumes, oil, and salt, and store them in flat totes that can slide under beds or stack in closets. A functional six-month supply for two people fits in a surprisingly small footprint when stored in stackable, labeled containers.
CONCLUSION
There is no perfect number for a six-month food supply. There is only your number, based on what your family actually eats, how you actually cook, and the space you actually have.
The rice example at the beginning of this post is not just a funny story. It is the whole point. Generic advice does not account for your life. The tracking method does. Start there, do your own math, add a buffer, and build from what you have. You do not have to do it all at once and you do not have to do it perfectly.
The goal is a pantry that works for you. One you cook from, rotate through, and trust when things get uncertain. That kind of pantry is built meal by meal, grocery trip by grocery trip. Not in one overwhelming weekend.
You have got this.
With love and adventure,
Mindy
How far along are you in building your pantry? Are you just getting started or do you already have a solid stockpile? Drop a comment below. I love hearing where people are on this journey.
📌 Pin for Later!